Light the Torch!

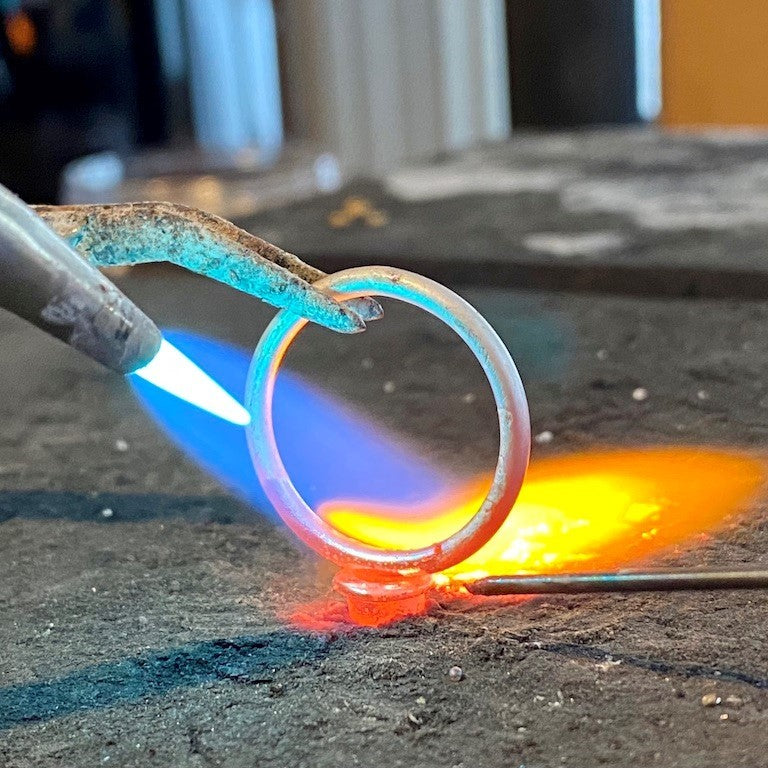
Open the tank valve, turn up the pressure and light the torch! It is time to solder, to run liquid metal across a surface to create a strong connection that bonds two pieces of metal into one. There is something ceremonial about firing up the torch; it requires intense focus and everything else around you disappears for those moments that you’re engaged with the flame. The warmth radiating from the torch fire and resulting glow of hot metal are meditative. Once the solder flows, I snap the torch off, pausing to watch the glow dim away before I quench my piece. As I drop it in the water, the hot metal emits a sizzly slurp.
 Solder is a silver alloy that has a lower melting point than sterling silver. It is the “glue.” During the soldering process, the silver metal undergoes a series of changes in color until it reaches the desired temperature where the metal is hot enough to melt the solder. Melting this compatible alloy allows you to join two parts without melting the entire piece, and the color match is very close so that you can’t see any difference.
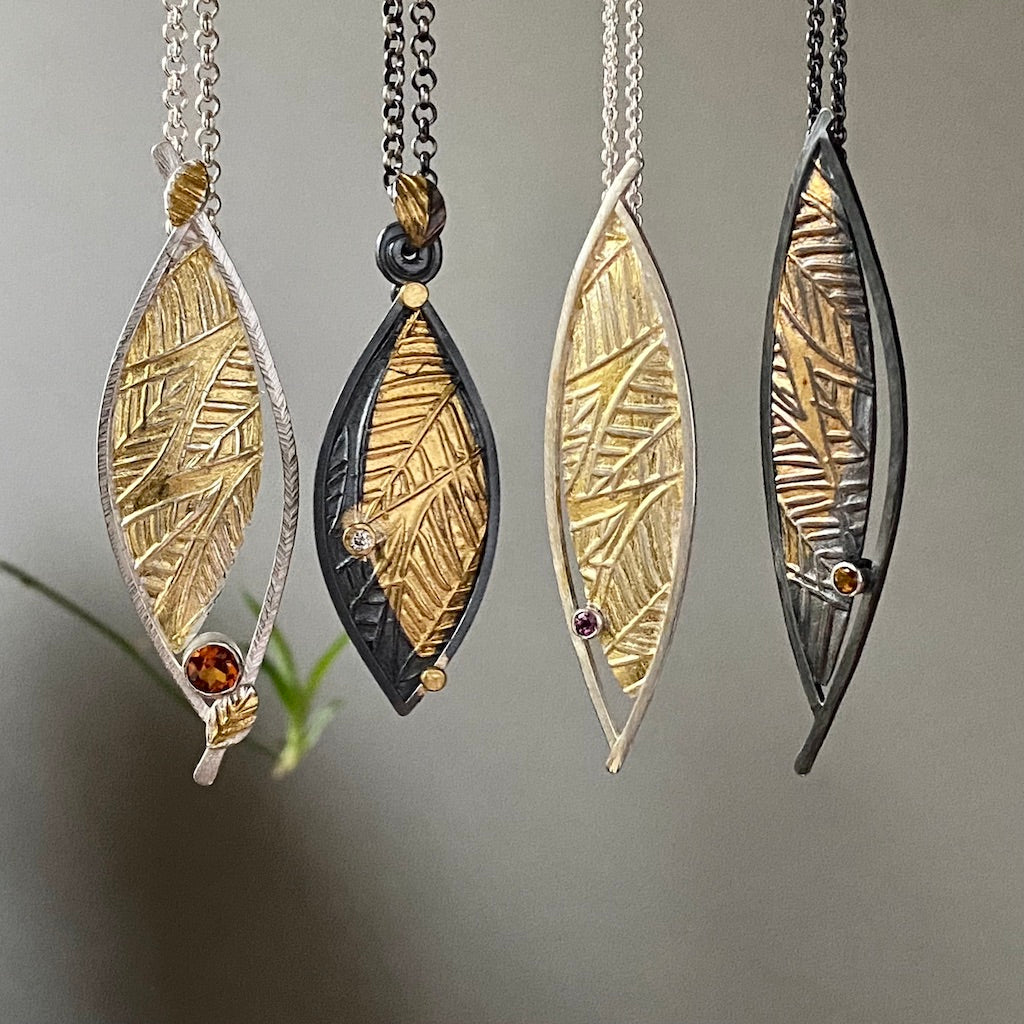
 In a piece like the Essential Ring, I fabricate the ring shank and setting separately and then connect them by soldering. I use the torch for joining at least four times during the entire ring-making process. The final connection is soldering the setting to the ring shank. I check to make sure the solder makes a clean, strong connection before I move on to the finishing process and setting the gemstone.
 In another post, I’ll talk about the finishing process, setting gemstones and sizing rings. Or, if there’s another part of the process you’re curious about, let me know! In the meantime, I hope you enjoy browsing my website.
Stay well,
KarenAlso in The Soldering Bench

Summer! You know what that means...
The world of fine craft really comes alive in summertime. Craft fair season begins and we artists come out of our studios to hit the road to and share our craft in person. I’m gearing up for a busy summer season and look forward to catching up with everyone at a craft fair near you.
I'm bringing my jewelry to the Mount Washington Valley Farmers Market on June 28th at the North Conway Community Center, and then it’s on to Art in the Park in Petoskey, Michigan, July 16, and then the League of NH Craftmen’s Annual Fair at Mount Sunapee Resort in August. I’ve updated my events page so you can follow along and find me.

Wrap Up 2021 and Tie It with a Bow